How to Make An Impressive Architecture Model?
What is an architecture model?
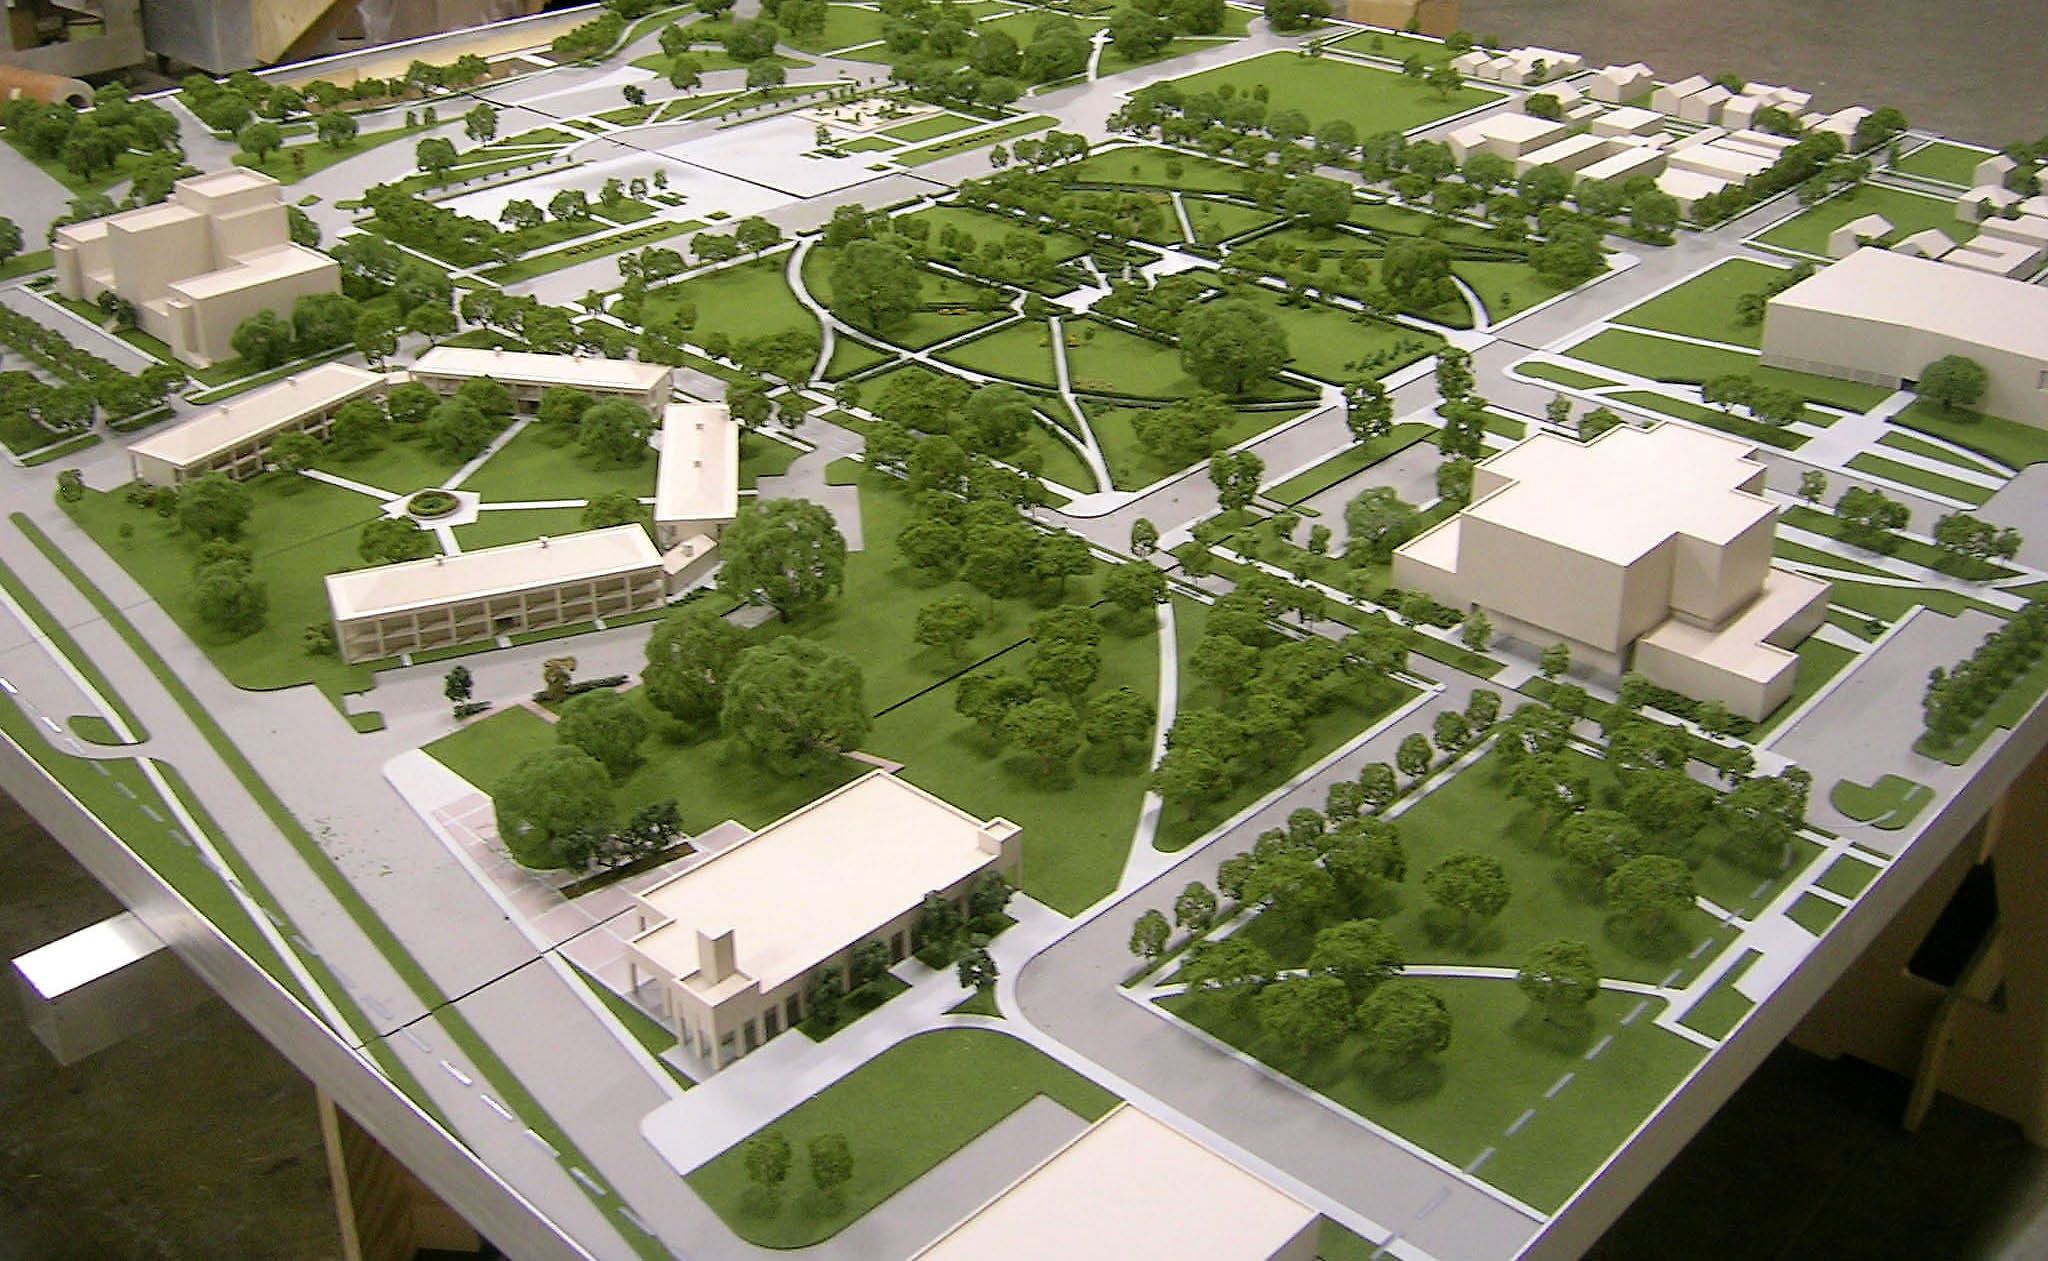
An architecture model is a physical representation or visualization of an architectural design or concept. It can be a miniature version of a building, a scaled-down model of a specific area or site, or a representation of an urban plan or landscape. Architecture models can be made of a variety of materials, such as paper, foam, plastic, wood, or metal, and they can be created using various techniques, such as cutting, gluing, 3D printing, or computer-aided design (CAD). Architecture models are often used by architects, urban planners, and designers as a tool to communicate their ideas and designs to clients, stakeholders, or the public. They can also be used to test and refine the design before the construction phase begins.
Architecture Model Tips:
Here are some tips for making architecture models:
- Plan your model: Plan out your model design before you begin. This will save you time and ensure that your model is accurate.
- Choose the right materials: Choose materials that are suitable for the scale and complexity of your model. Common materials include foam, cardboard, wood, and plastic.
- Use the right tools: Use tools that are appropriate for the materials you are working with. Common tools include knives, scissors, rulers, and glue guns.
- Pay attention to detail: Attention to detail is essential for creating an accurate and visually appealing model. Ensure that all the elements of your model are proportional and realistic.
- Practice precision: Precision is key when working with small-scale models. Use a ruler to ensure that all measurements are accurate, and take your time when cutting and gluing.
- Test your model: Test your model frequently as you work on it to ensure that everything is coming together properly and that the design is functioning as intended.
- Be patient: Model-making can be a time-consuming process, so be patient and take breaks as needed to avoid burnout.
- Use lighting: Using lighting can help highlight important details and bring your model to life. Consider using LED lights or other types of lighting to illuminate your model.
- Experiment with textures: Experiment with different textures and finishes to create visual interest in your model. Consider using paint, decals, or other materials to add depth and texture.
- Don’t be afraid to make changes: If something isn’t working in your model, don’t be afraid to make changes or start over. This is all part of the learning process, and you will improve with practice.
1.What will you be modeling?
- Scale
- The scale of your architecture model is also essential. Determine the size of the model you need to build. If the model is too small, you may have a hard time presenting the details, and if it’s too big, it may not fit in the space you plan to showcase it. Moreover, the scale should also be suitable for the audience that you are presenting to. If it’s a smaller group, you might need a smaller model, but if it’s a larger group, you might want to consider a larger model for better visibility.
- Tools
- There are a lot of tools you can use to create your architecture model. You can use traditional tools like foam board, paper, and cardboard, or you can use 3D printing and laser cutting technology. It’s important to choose the tools that best suit your project and your budget.
- Sequence
- Once you have your tools and scale determined, it’s time to start building your model. It’s essential to have a clear sequence in mind before you start. Begin with the base or foundation and work your way up to the top. This will help you stay organized and ensure that everything fits together correctly.
- Aesthetic presentation
- The aesthetic presentation of your model is critical. You want your model to look professional and visually appealing. Consider the colors, lighting, and textures you use. You might want to add landscaping or other design elements to enhance the model’s appearance.
- Budget-saving tricks
- Finally, there are some budget-saving tricks you can use to create your model. For example, you can use recycled materials like cardboard or foam board. You can also reuse materials from previous models or ask for donations from local businesses.
- In summary, to create the best architecture model possible, you need to understand the nature and size of the project, determine the scale, choose the right tools, have a clear sequence, focus on the aesthetic presentation, and use budget-saving tricks.
2.What scale is used in most architectural models?
In architectural models, the most commonly used scale is the 1:50 scale, also known as the 1/4 inch scale. This means that one unit of measurement on the model represents 50 units in real life.
However, depending on the size and complexity of the building, other scales may also be used, such as the 1:100 scale (1/8 inch scale) or the 1:200 scale (1/16 inch scale). The choice of scale depends on the purpose of the model, the level of detail required, and the size of the final model.
3.What are the suitable materials to use?
The suitable materials to use depend on the context and the specific application. Here are some factors to consider when selecting materials:
- Functionality: The material should be suitable for the intended function. For example, if you’re building a structure, you’ll want a strong, durable material that can withstand the loads it will be subjected to. If you’re making a garment, you’ll want a soft, comfortable material that can be easily tailored.
- Environment: The material should be able to withstand the environmental conditions it will be exposed to. For example, if you’re building a bridge in a coastal area, you’ll want a material that can resist corrosion from saltwater. If you’re making a product that will be exposed to sunlight, you’ll want a material that won’t degrade or discolor over time.
- Cost: The cost of the material should be taken into account. Some materials may be ideal, but too expensive for the project. It’s important to find a balance between quality and cost.
- Availability: The material should be readily available in the quantity and quality required for the project. If a material is hard to find or has limited availability, it may not be a practical choice.
- Safety: The material should not pose a risk to people or the environment. For example, some materials may be toxic or flammable and should be avoided if there are safer alternatives.
3.1Examples of suitable materials for different applications include:
- Metals (such as steel, aluminum, and copper) for building structures and machinery
- Plastics (such as polyethylene and polycarbonate) for packaging and consumer products
- Wood for furniture and building construction
- Ceramics for heat-resistant applications such as furnace linings and cookware
- Concrete for building construction and infrastructure
- Natural fibers (such as cotton and wool) for clothing and textiles
- Synthetic fibers (such as polyester and nylon) for clothing and textiles
- Glass for windows and decorative applications.
4. What are the right tools to use for cutting and assembly?
The right tools for cutting and assembly will depend on the materials being worked with and the specific project at hand. Here are some general guidelines:
Cutting Tools:
- For cutting wood, a saw (such as a hand saw, circular saw, or jigsaw) is typically used.
- For cutting metal, a hacksaw, angle grinder, or plasma cutter may be appropriate.
- For cutting fabric or leather, a rotary cutter or scissors may be used.
Assembly Tools:
- A hammer and nails or screws are commonly used for joining pieces of wood or metal.
- Clamps can also be used to hold pieces in place during assembly.
- For more precise work, a drill and drill bits, or a screwdriver, may be used to make holes for screws or bolts.
- Glue or adhesives may also be used to bond materials together.
It is important to always use the appropriate safety equipment when working with tools, such as safety glasses, gloves, and ear protection. Additionally, it is important to follow instructions and guidelines for each tool and to use them carefully to avoid injury.
5. What to use for finishing materials in your architecture model?
There are several options for finishing materials in an architecture model, depending on the desired look and feel of the model. Here are some common materials that can be used for finishing:
- Paint: Painting is a versatile and affordable way to add color and texture to a model. Acrylic paint is a popular choice because it dries quickly and can be easily cleaned up with water.
- Wood veneer: If your model has a lot of wooden elements, using a thin layer of wood veneer can add an extra layer of realism to your model. Wood veneer can be cut and glued to surfaces with a strong adhesive.
- Tiles: Tiles are commonly used to add texture and detail to a model. They can be made from a variety of materials including ceramic, glass, or even paper.
- Wallpaper: Wallpaper is a great way to add patterns and textures to a model. There are many different patterns and textures available, and wallpaper can be easily applied with glue.
- Textiles: Textiles like fabric or felt can be used to add softness and texture to a model. They can be glued or sewn onto surfaces.
- Metal sheets: If your model has metal elements, using thin sheets of metal can add a realistic look and feel. These sheets can be cut with scissors or a razor blade and glued to the model.
It is important to consider the scale of the model and the level of detail required when choosing finishing materials. It is also important to choose materials that are easy to work with and that will not damage the model over time.
6. How to furnish and landscape your architecture model?
Furnishing and landscaping are important components of architecture models, as they bring the design to life and help the viewer imagine the space in a realistic way. Here are some steps to follow when furnishing and landscaping your architecture model:
- Determine the scale: Determine the scale of your model so that you can choose appropriately sized furniture and landscaping elements. The scale will also help you determine how much detail to include.
- Choose appropriate furniture: Choose furniture that matches the style and function of the space. Use a mix of styles and materials to create interest and variety. Miniature furniture pieces can be purchased or custom-made using materials like paper or foam board.
- Create fixtures and finishes: Use small details like light fixtures, faucets, and door handles to add realism to the model. These details can be made from materials like wire or beads and painted to match the rest of the model.
- Add greenery: Incorporate landscaping elements like trees, bushes, and grass to bring life to the model. Materials like modeling clay, paper, or plastic can be used to create these elements.
- Add accessories: Add smaller accessories like artwork, rugs, and plants to add texture and depth to the space. These can be purchased or made using materials like paper, fabric, or clay.
- Arrange the elements: Arrange the furniture, landscaping, and accessories in a way that makes sense for the space. Use a combination of symmetry and asymmetry to create balance and interest.
Remember to consider the overall design concept and style of the space when choosing furnishings and landscaping elements. Be creative and have fun with the process, and don’t be afraid to experiment with different materials and styles to create a truly unique architecture model.
Types of Architectural Design Models:
There are several types of architectural design models that architects and designers use to visualize their ideas and communicate them to clients and stakeholders. Here are some of the most common types:
- Concept Models: These are preliminary models used to explore design ideas and test out different concepts. They are usually simple and not highly detailed, and can be made from a variety of materials like foam board, cardboard, or paper.
- Study Models: Study models are more detailed than concept models, and are used to explore and refine specific design elements. They may include more realistic materials like wood, plastic, or metal, and can be used to experiment with lighting and shadow effects.
- Presentation Models: Presentation models are highly detailed and realistic, and are used to communicate the final design to clients and stakeholders. They may include features like interior furnishings, landscaping, and lighting effects, and are usually made from high-quality materials like wood, acrylic, or 3D-printed materials.
- Massing Models: Massing models are used to show the overall form and volume of a building or site. They are usually simple and not highly detailed, and can be made from materials like foam board or 3D-printed plastic.
- Site Models: Site models are used to show the surrounding context of a building or site, including terrain, landscape, and other buildings. They can be made from a variety of materials like foam board, plaster, or 3D-printed materials.
- Detail Models: Detail models are used to show specific design details, like the structure of a building or the construction of a facade. They may include materials like wood, metal, or plastic, and can be highly detailed and intricate.
The type of model used will depend on the purpose of the design, the stage of the design process, and the level of detail required to communicate the design effectively.
Finally, here are some general tips that will help you with your architecture model-making:
- Plan ahead: Take the time to plan out your design and gather all the necessary materials and tools before starting the model-making process. This will help you work more efficiently and avoid mistakes.
- Use the right tools: Use tools that are appropriate for the materials you are working with, and make sure they are in good condition. Common tools include knives, scissors, rulers, and glue guns.
- Work in layers: Start with a simple base layer and build up the details gradually. This will help you stay organized and avoid mistakes.
- Use reference materials: Use photographs, drawings, and other reference materials to help guide your design and ensure accuracy.
- Be patient: Model-making can be a time-consuming process, so be patient and take breaks as needed to avoid burnout.
- Experiment with materials: Don’t be afraid to experiment with different materials and techniques to achieve the desired look and feel of your design.
- Test as you go: Test the model frequently as you work on it to ensure that everything is coming together properly and that the design is functioning as intended.
- Don’t be afraid to start over: If a particular element of the model isn’t working, don’t be afraid to start over or make changes as needed to achieve the desired result.
- Practice and refine your skills: Model-making is a skill that takes practice to master, so continue to practice and refine your skills over time.
- Enjoy the process: Model-making can be a fun and rewarding experience, so enjoy the process and don’t be afraid to let your creativity shine.


0 комментариев
Написать комментарий